Quick guide for role based authentication using MSAL (v1.4) and Nest Azure Active Directory Token Validator

Here in this guide, we’re going to use MSAL for our frontend (built with AngularJS) and Nest Azure Active Directory Token Validator for our backend (built with NestJS, naturally). These libraries are simple and straightforward and with a guide to their intricacies, I hope that by the end of this guide you are using Azure AD to authenticate your users through Microsoft.
Setting up Azure AD
We will go through the set up but you can also find a comprehensive quickstart guide for registering on Azure AD here: https://docs.microsoft.com/en-us/azure/active-directory/develop/quickstart-register-app, https://docs.microsoft.com/en-us/azure/active-directory/develop/quickstart-configure-app-expose-web-apis
The first thing we need to do is set up our application and API. Head over to the Azure portal and go to the menu and open Azure Active Directory. From there under manage head to App Registrations > New Registration. That should bring you to this menu.
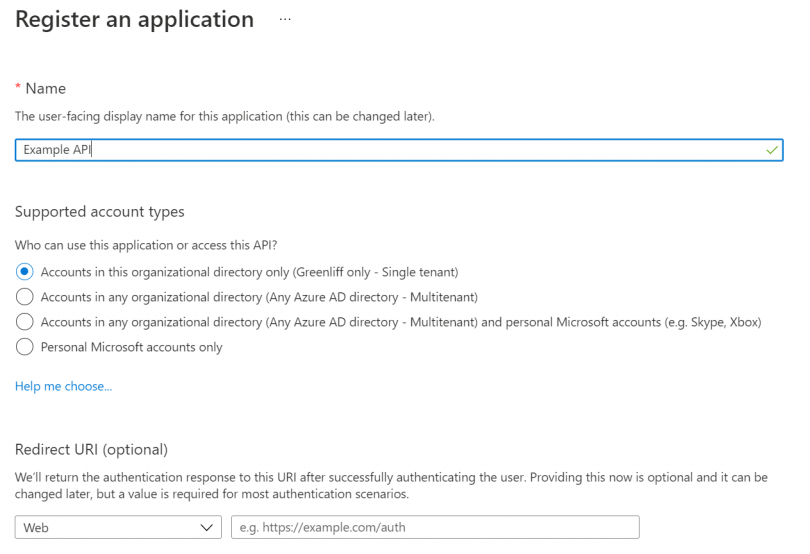
Enter a name for your app registration as well as what account types should be allowed. Single Tenant means that only accounts under your company can log in using this app. Your Redirect URI here is the address that the application should return to after authentication has occurred. You only need to do this for the front end app, for an API, you can leave this blank.
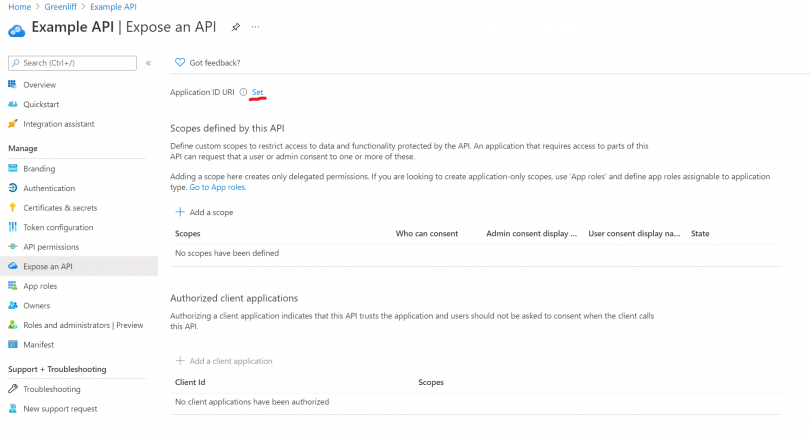
Afterwards, you can head to app registration again and register another app for your API. Here, once we’re done, head over to “Expose an API” under manage for you API registration and hit “Set” to create a URI.
Save strings
Once that’s done, make a note of the following information for each of the app registrations:
- The Application ID
- Directory ID
- Application ID URI
They can be found here on the home page for your registrations where the red dots are.

Create a role
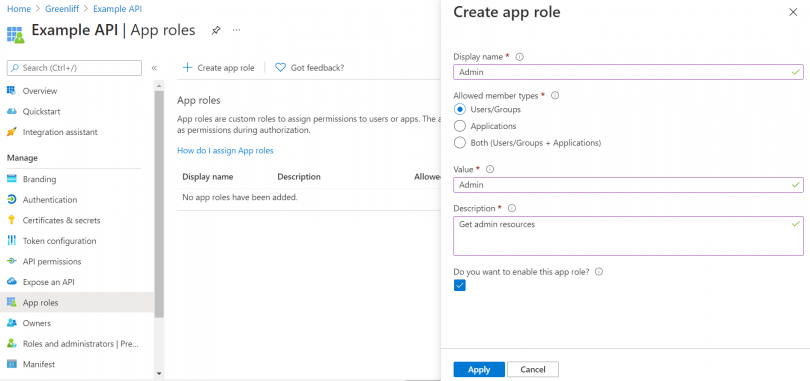
One of the next things we need to do for our application is define roles. Roles help create permission levels for logged in users, allowing us to differentiate with ease who is, for example, an admin and whose not.
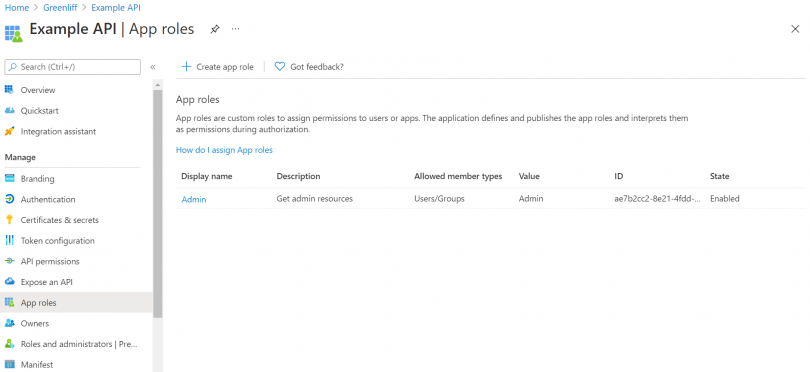
Once the Admin role is created, we need to assign it to someone to make it work. For this tutorial, I assigned it to myself. You can do so by heading over to the Enterprise applications section, choosing you application and going to roles. From there, simply add an assignment and select yourself.


With this done, we’re ready to head over to our code and integrate MSAL and Nest Azure Active Directory Token Validator.
MSAL set up:
In your app.module.ts file add MSAL lines as follows, inserting your application ID and tenant ID from your front end app registration from before.
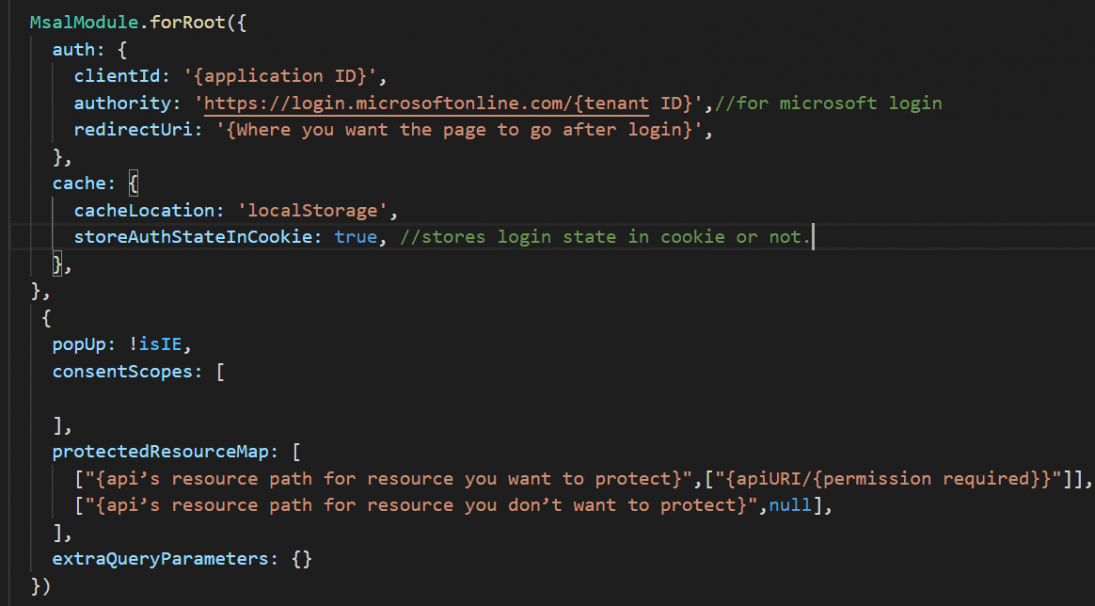
Pay attention to the protectedResourceMap, here we’ll put in the URL we will use for our API and path to the resource requests and then in the second box, we’ll put in the api URI followed by a / followed by the scope this resource requires. If you dont have a scope that is needed for that path but still want to validate users who want to access it, put “{apiURI}/.default”. Importantly, if you have some resource paths you want to be unprotected, ie for users who arent signed in, put “null” in the scope. This prevents MSAL looking for any kind of token when it wants to make a request to those resources.
Logging in and out
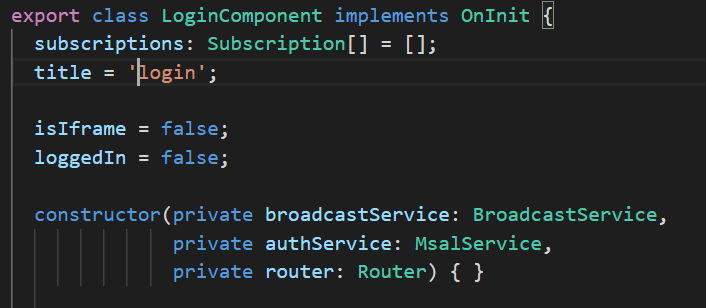
So next we want to log users in. For the basic project, I set up a little component that you can redirect to on button click for logging users in. I defined it as follows:
Next, we will initialise the components and set up a few events and logging details to help us later if things start going wrong.
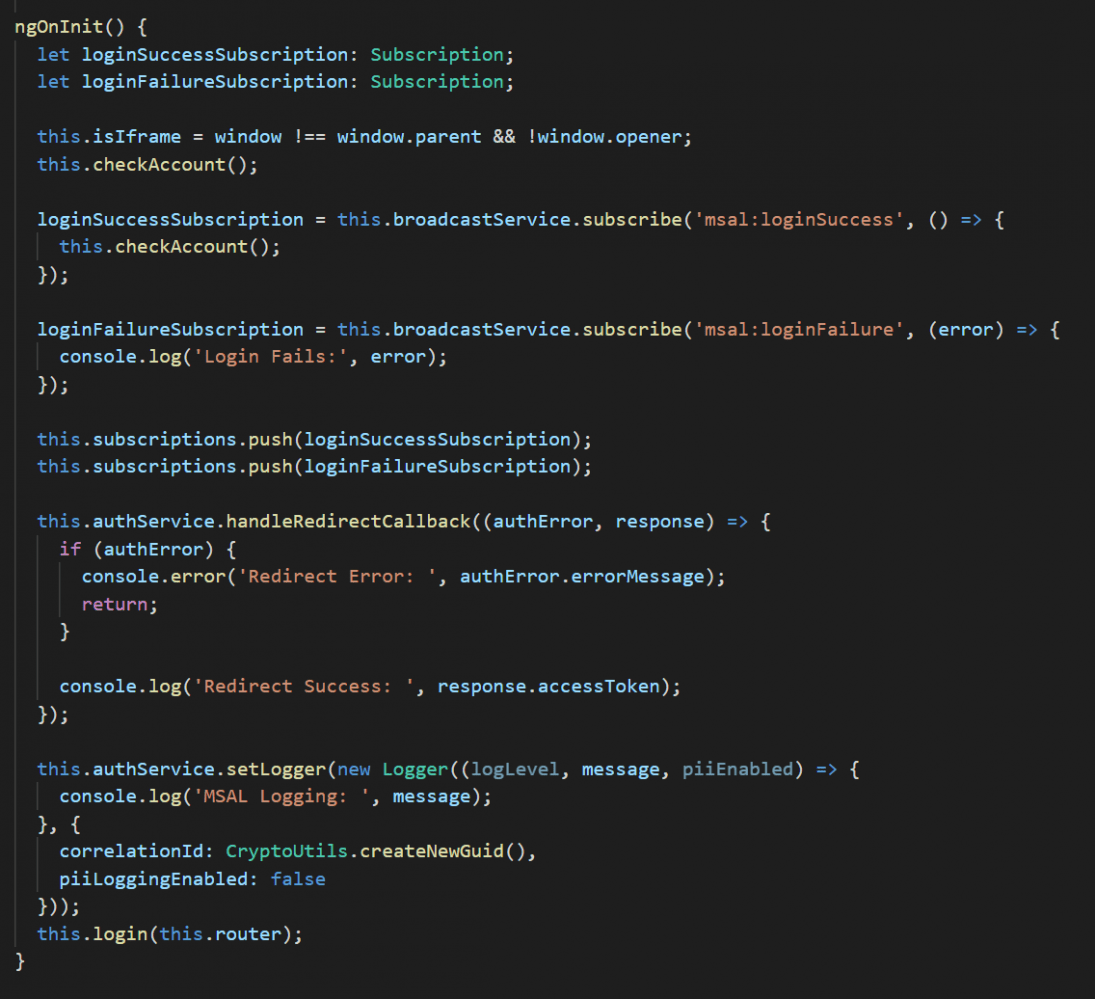

For the router navigation, after a successful or unsuccessful login, you are redirected back to the homepage, but you can put any path you would like here after your login has been completed, one way or the other.
Sending a request
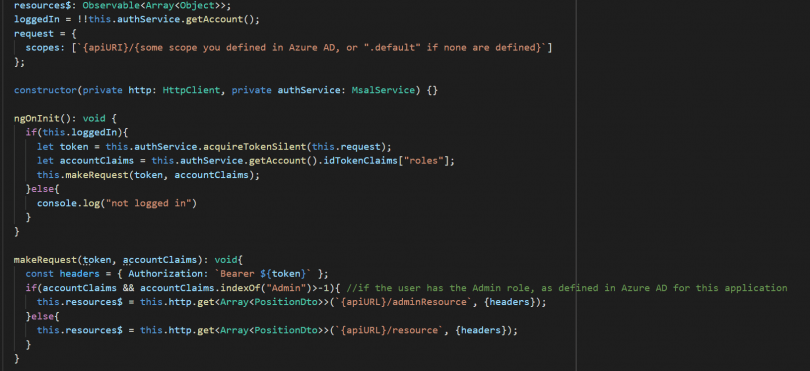
With all of that done, lets finally send a request to our api. First, lets check if we’re logged in, acquire the token if its present and hasn’t expired. In the token, before we make the request, we can check what roles the user has and make the appropriate resource request based on that.
Nest Azure Active Directory Token Validator
Now in the backend, we need to prepare to receive these requests.
Set up
There are two ways we can protect our API with this library. One is to protect all resources and another to protect each component individually based on need. If you want to generally protect all resources, add this text to the app.component.ts, otherwise add it to the resource.component.ts, where resource is whatever component you are sending requests to.
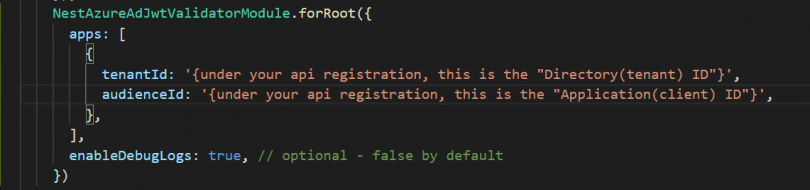
Now before, we took down some codes from Azure AD. In our API, we want to enter the Directory ID of our API app registration under tenant ID and the API app registration’s application ID as the audience ID. After that, we can move over to the controller for this resource to add our guards.
Roles vs No Role Resource
So here in the controller, we have two get methods. One, getAllOnlineResources(), doesn’t have any guards and can be requested by anyone. This would be what our frontend gets back when they call apiURL/resource. The other get method is guarded with the @Roles(‘Admin’) line above it. With this, our validator will check that incoming token in the header. It will look for that “Admin” role in the account claims and if it can't find it, it will reject the request.

And that’s all to it! I hope this guide has been helpful to you in using Azure AD, MSAL and Nest Azure Active Directory Token Validator.